I’ve been trying to update my guest room/study for the last two years. I started out with a bold chalkboard wall, which serves as both an accent wall and a place to scribble notes. And I love it! For some reason, though, the rest of the room just wouldn’t hang together.
The Floor Plan
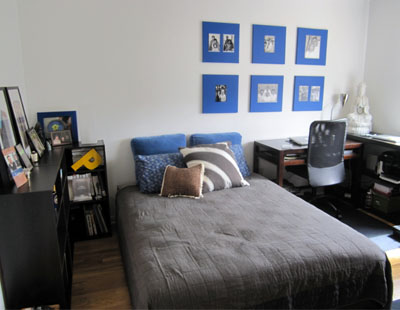
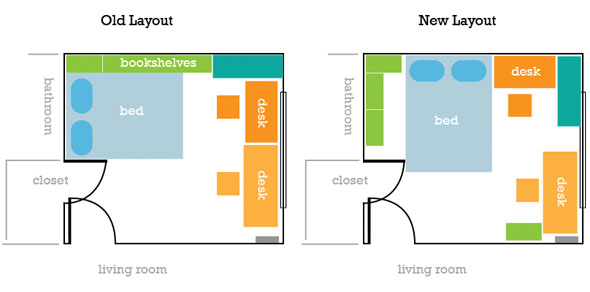
So I buckled down and worked out a better floor plan. While I lost some floor space, I gained better working/desk nooks, made the bed more accessible and opened up the bookshelves. This room works hard as both a cozy guest area and a daily working space for two people.
With a new useful floor plan chalked out and ready, I needed to do some decorating to tie the whole thing together. It seemed to me that I just needed one simple focal point – which should be the bed.
The Headboard Focal Point
I was on a budget, on a mission and working with a limited amount of space. It seemed like the best solution was to create my own headboard using fabric. Here’s how I did it:
- Find some fabric that you love. I like something with a pattern or color because this fabric will become a piece of art on the wall.
- Look for home decor fabric. Fabric for decorating comes in a full 60″ width (clothing bolts are only 45″ wide). Note: Queen sized mattresses are also 60″ wide, which makes this project super easy.

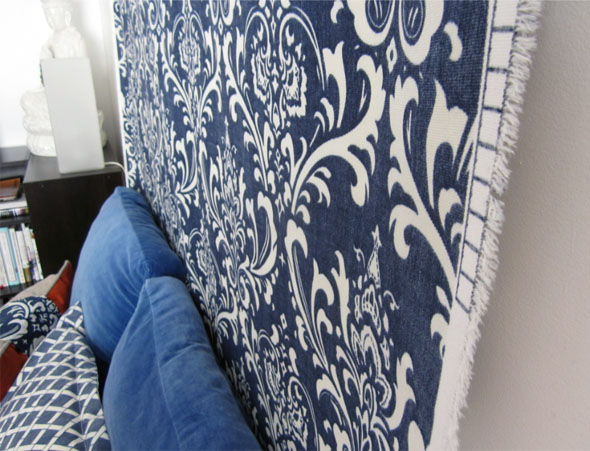
- Use the full width of the fabric. I kept the look casual and didn’t even bother cutting or sewing the sides. You can still see the selvage edge of the fabric (but I think it adds character)
- Cut to the desired length, leaving about 4-5 inches extra as a header and footer.
- Now for the simple sewing. Fold and sew the header. I made a 2 inch header. You can fold it twice to make sure the raw edge is covered. Do the same for the bottom (but smaller). If you don’t have a sewing machine, just use the iron-on tape to fold the fabric over.
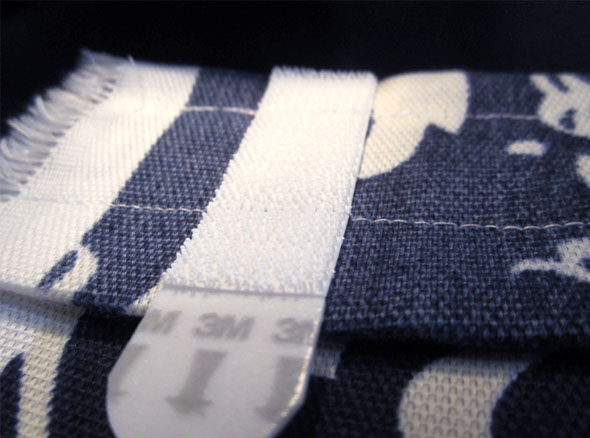
- Attach fasteners. I used 3M Command picture hanging strips. You must actually sew the strip onto the header of the fabric. The adhesive will not stick to fabric. I sewed 4 strips onto the fabric and then stuck four strips on the wall.
- Voila! Hang your fabric flush against the wall (without causing any wall damage).
- Note: In the past, I have also used a staple gun or small nails to achieve the same effect. 3M strips are better for the wall and probably less dangerous in case something should fall.
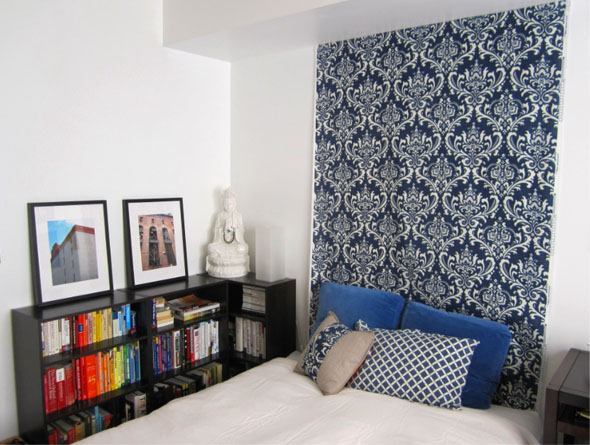
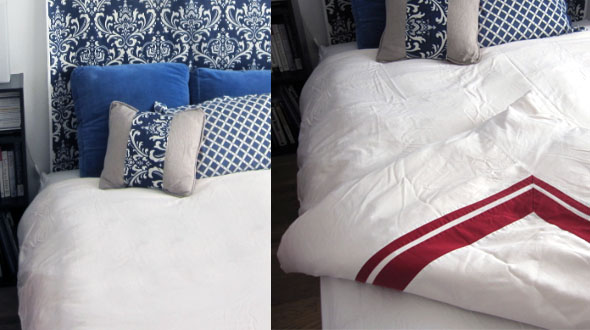
Check out how some simple fabric makes such a bold statement! It really helps to ground the bed…and the entire room.
Bonus Tips and Tricks
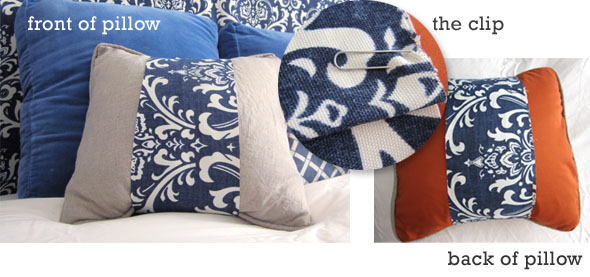
I also made some quick matching pillows for the ensemble (the two smaller pillows). For one, I made a simple sham, which is basically like sewing a square. For the smaller pillow, I did a quick no-sew job using a pillow from my living room. I turned the pillow to show the nice linen backside, and then literally pinned a “stripe” down the middle. Done!
Other great low-budget decorating for this room include the white duvet. I used an old duvet with a red stripe and turned it over. It’s always a good idea to raid your closet for sheets, towels, scarves and other items that can be turned, tied or folded into something new and fresh!
And lastly, who can resist the rainbow spectrum book bookshelf?

Leave a Reply